Fixing the SD Card Reader on my Canon T3i
A few weeks back my 10-year-old Canon T3i started showing the error message "Card's write protect switch is set to lock" and refusing to save new photos, even when the card was unlocked.
I had no idea if I could do this fix myself until I found this video on how to repair my exact problem, so in the tradition of paying it forward I've documented my own process here. The whole repair took under two hours and required minimal technical knowledge[1].
Initial Preparation
Before disassembling an expensive camera, I made sure that the camera's card reader was broken and not the SD card itself. The error could simply be that the write protect switch had come loose from the SD card[2], but in my case I could write to the card with my laptop so I was quite sure the camera was at fault.
I removed the battery and the SD card before disassembling anything. I also got a sheet of paper and recorded the size and location of every screw and cable I removed. This turned out to be necessary for me to reassemble the camera, as there were six different sizes of screw and over a dozen cables to put back!
Getting Into It
The SD card reader was accessable through the back of the camera. I removed each of the screws around the edge of the edge of the back plate: Most of these were easily visible, but four were behind the rubber grip on the left hand side. There was one other rubber patch which needed to be removed even though it doesn't cover any screws. These rubber patches were easy to peel off, and they re-adhered nicely at the end. I also removed the casing around the foldable display arm to make sure it didn't crack when the back plate was removed.
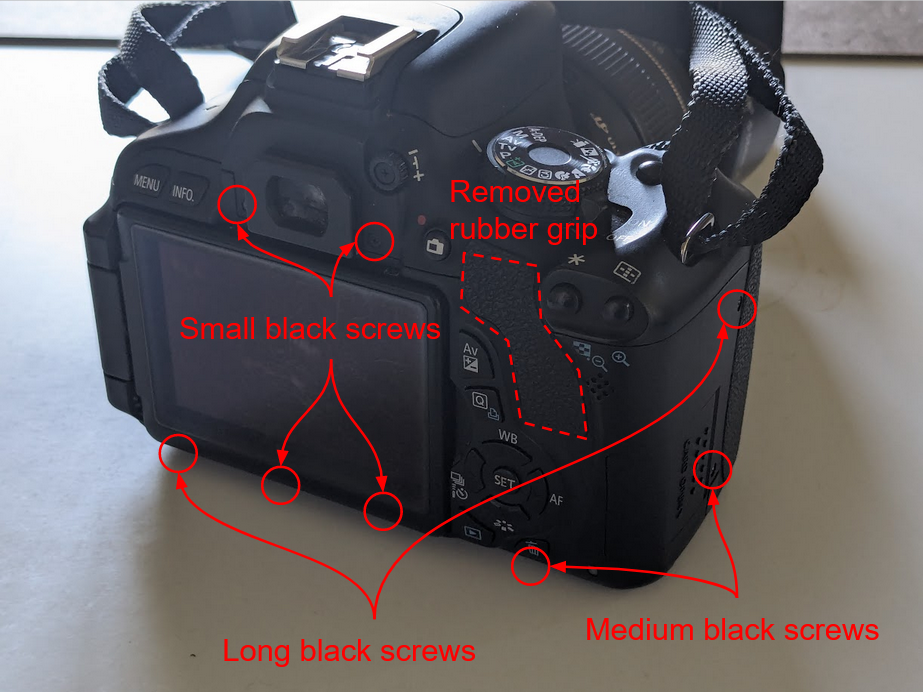
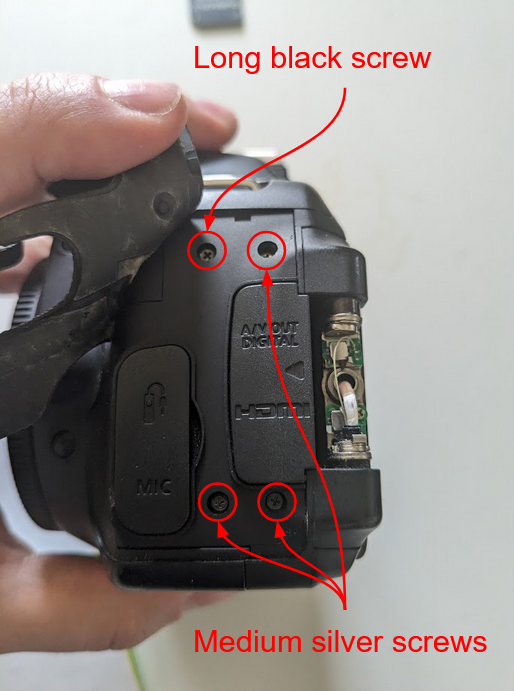
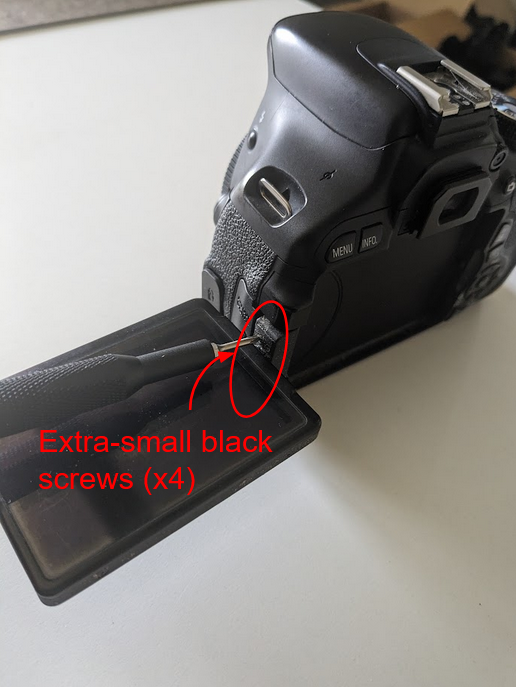
After that I was able to pry off the back plate, but it was still attached to the PCB underneath by two cables: one of them came off easily while the other needed to be pried up with a medium amount of force from the sides.
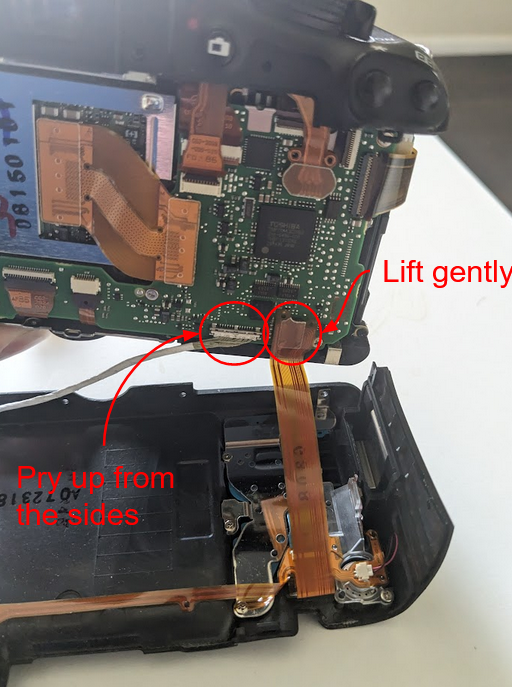
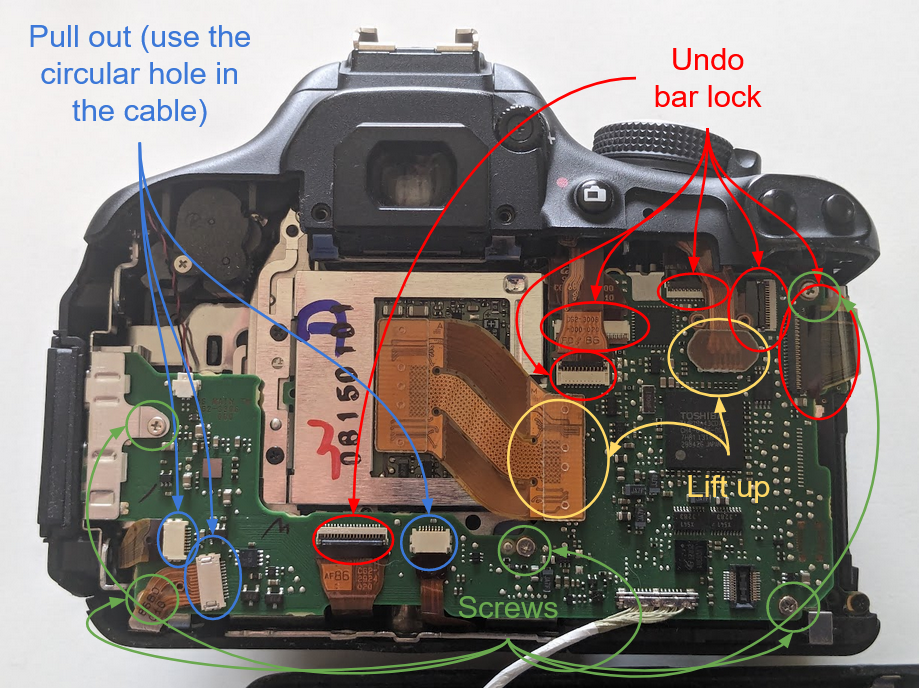
Once I removed the back plate, I had access to the PCB which contains most of the camera logic. Sadly the SD card was on a separate PCB below this one, so I had to remove this top PCB by unscrewing it and releasing each of the cables:
- A couple cables could be lifted up gently like the one on the back plate
- Most of the cables had plastic bar lock which was folded down on top of the cable: I needed to fold this bar up, then pull the cable out
- Some cables did not have a bar lock: Instead these cables had small holes near the connectors, so I used a small piece of metal the size of a paperclip to pull them out
- There is a power cord which I could have removed by pulling firmly on the white connector, although I was able to get the PCB out of the way enough to access the SD card reader without unplugging it
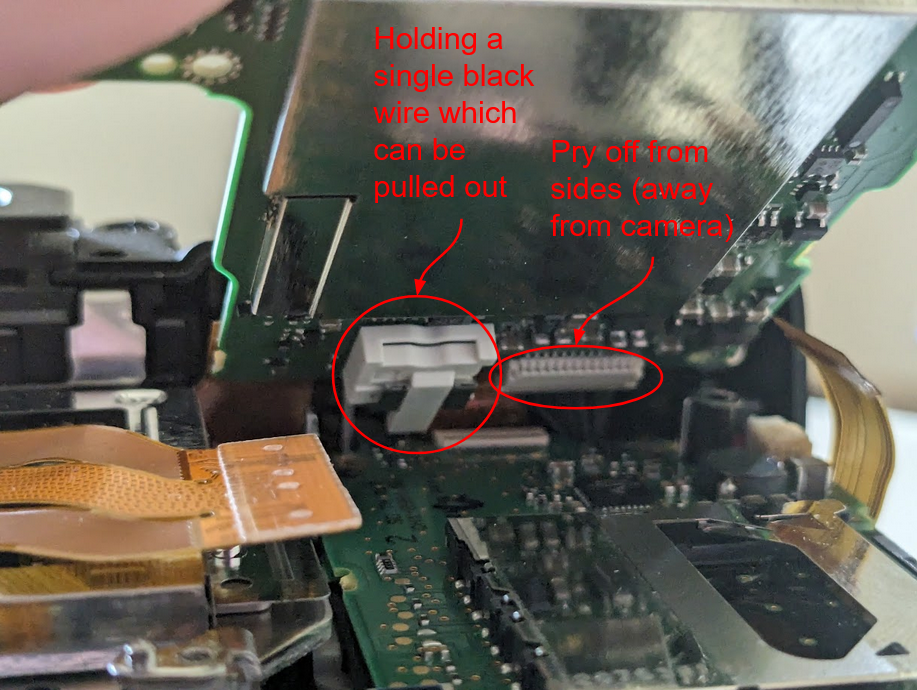
Removing all of those allowed me lift the PCB up, but there were two final cables on the underside: one of them could be pried off from the sides, while the other seemed to hold a single black wire in place but didn't lock or clamp it at all. I used a screwdriver to pull this wire out from behind the top edge of the PCB, but I think I could have pulled the PCB directly away from the wire instead.
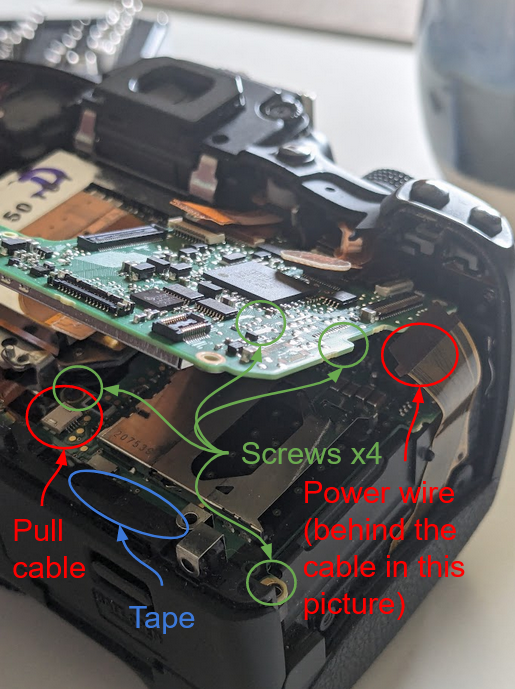
Finally, this gave me access to the SD card reader. There was one cable I needed to pull out and a power wire which I removed by pulling on the white plug. There was also a piece of black tape which I removed so I could pull the board up directly because it was blocking the removal of a small piece of PCB, but neither the tape nor the PCB was actually attached to anything so I could probably have finagled the board out without removing it.
Actually Fixing the Problem
I wasn't certain what was wrong with this card reader, but according to that video I mentioned earlier the lever protruding from the side is supposed to contact the metal of the casing when an SD card is in the unlocked position.
My lever wasn't anywhere close to the lock tab when an unlocked SD card was inserted, so it must have been bent far out of alignment or broken somehow. Returning it to the original position seemed impossible, so I took the same tactic as that video and permanently attached the lever to the casing. This should cause the camera to always consider SD cards "unlocked"[3]. This could probably have been fixed with tape or glue, but I chose to solder it.
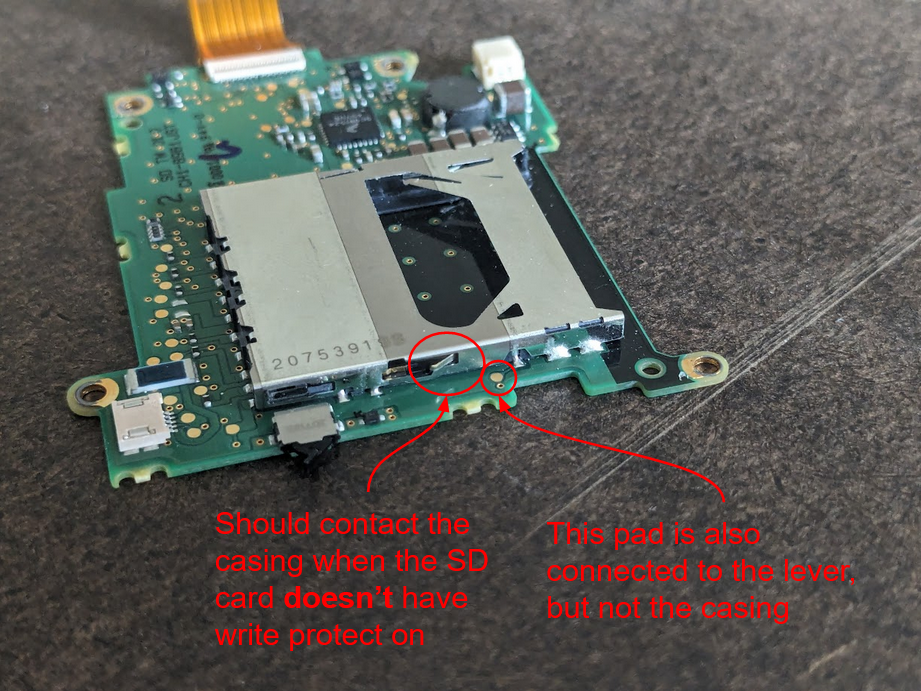
Before soldering anything, I used a multimeter to verify that I had the same PCB setup shown in the video: the write-lock lever was connected to a copper pad outside the casing, but neither was connected to the casing.
The author of the video solders a wire between the copper pad and the casing, then removes the lever entirely. I tried to copy this, but in the process I accidentally desoldered the copper pad and broke its connection to the lever! I did manage to connect the copper pad to the casing, which was probably sufficient, but just to be safe I also bent the lever around the outside of the casing and added some solder to hold it in place to ensure that all three components were connected. If I ever do this again, I'm skipping the copper pad and just soldering the lever to the casing from the start.
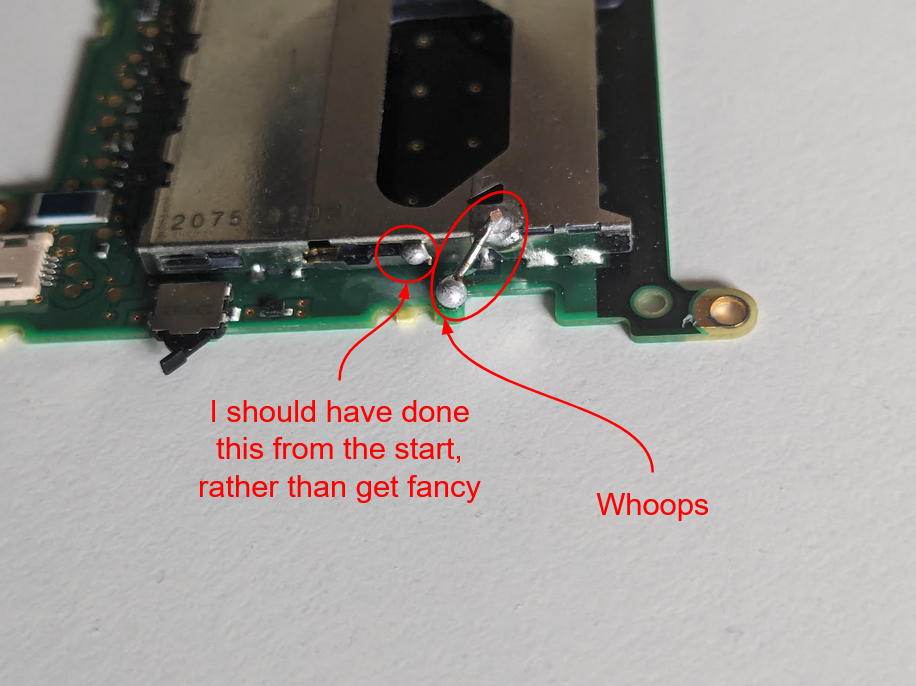
After pulling out the multimeter again to check that all the pieces were connected, it was a simple matter of doing all that again but backwards. Thankfully, that was much easier than the other way around. Since then it's been working like a charm!